


Git | Repository
05 Jul 2021 | ETC.
Github
Git은 여러명이 하나의 소스코드를 동시에 작업하기 위한 협업 관리 도구이다. 여러명이 동시에 사용할 수 있고, 작업된 모든 commit 내역이 저장되어 오류가 생겼을 때 복구가 수월하여 안전하게 프로젝트를 진행할 수 있다.
Github 사용자는 committer와 contributer로 나뉜다. 누구나 두 역할을 모두 수행할 수 있다. Github에는 많은 오픈소스들이 있는데, 각 오픈소스들의 주인이 committer이고, 그 오픈소스에 대해 contribution(오류 수정/ 기능 추가/ 보안 취약점 수정 등)하는 사용자가 contributer이다. contributer가 committer에게 오픈소스 수정 내용에 대한 PR(Pull Request)를 보내면 committer가 반영 여부를 결정한다.
Git Repository
Git으로 프로젝트를 진행하려면 일단 github에 가입을 해야하고, 가입 후에는 Repository를 만들어야 한다. Repository를 만드는 방법을 소개해 보도록 하겠다.
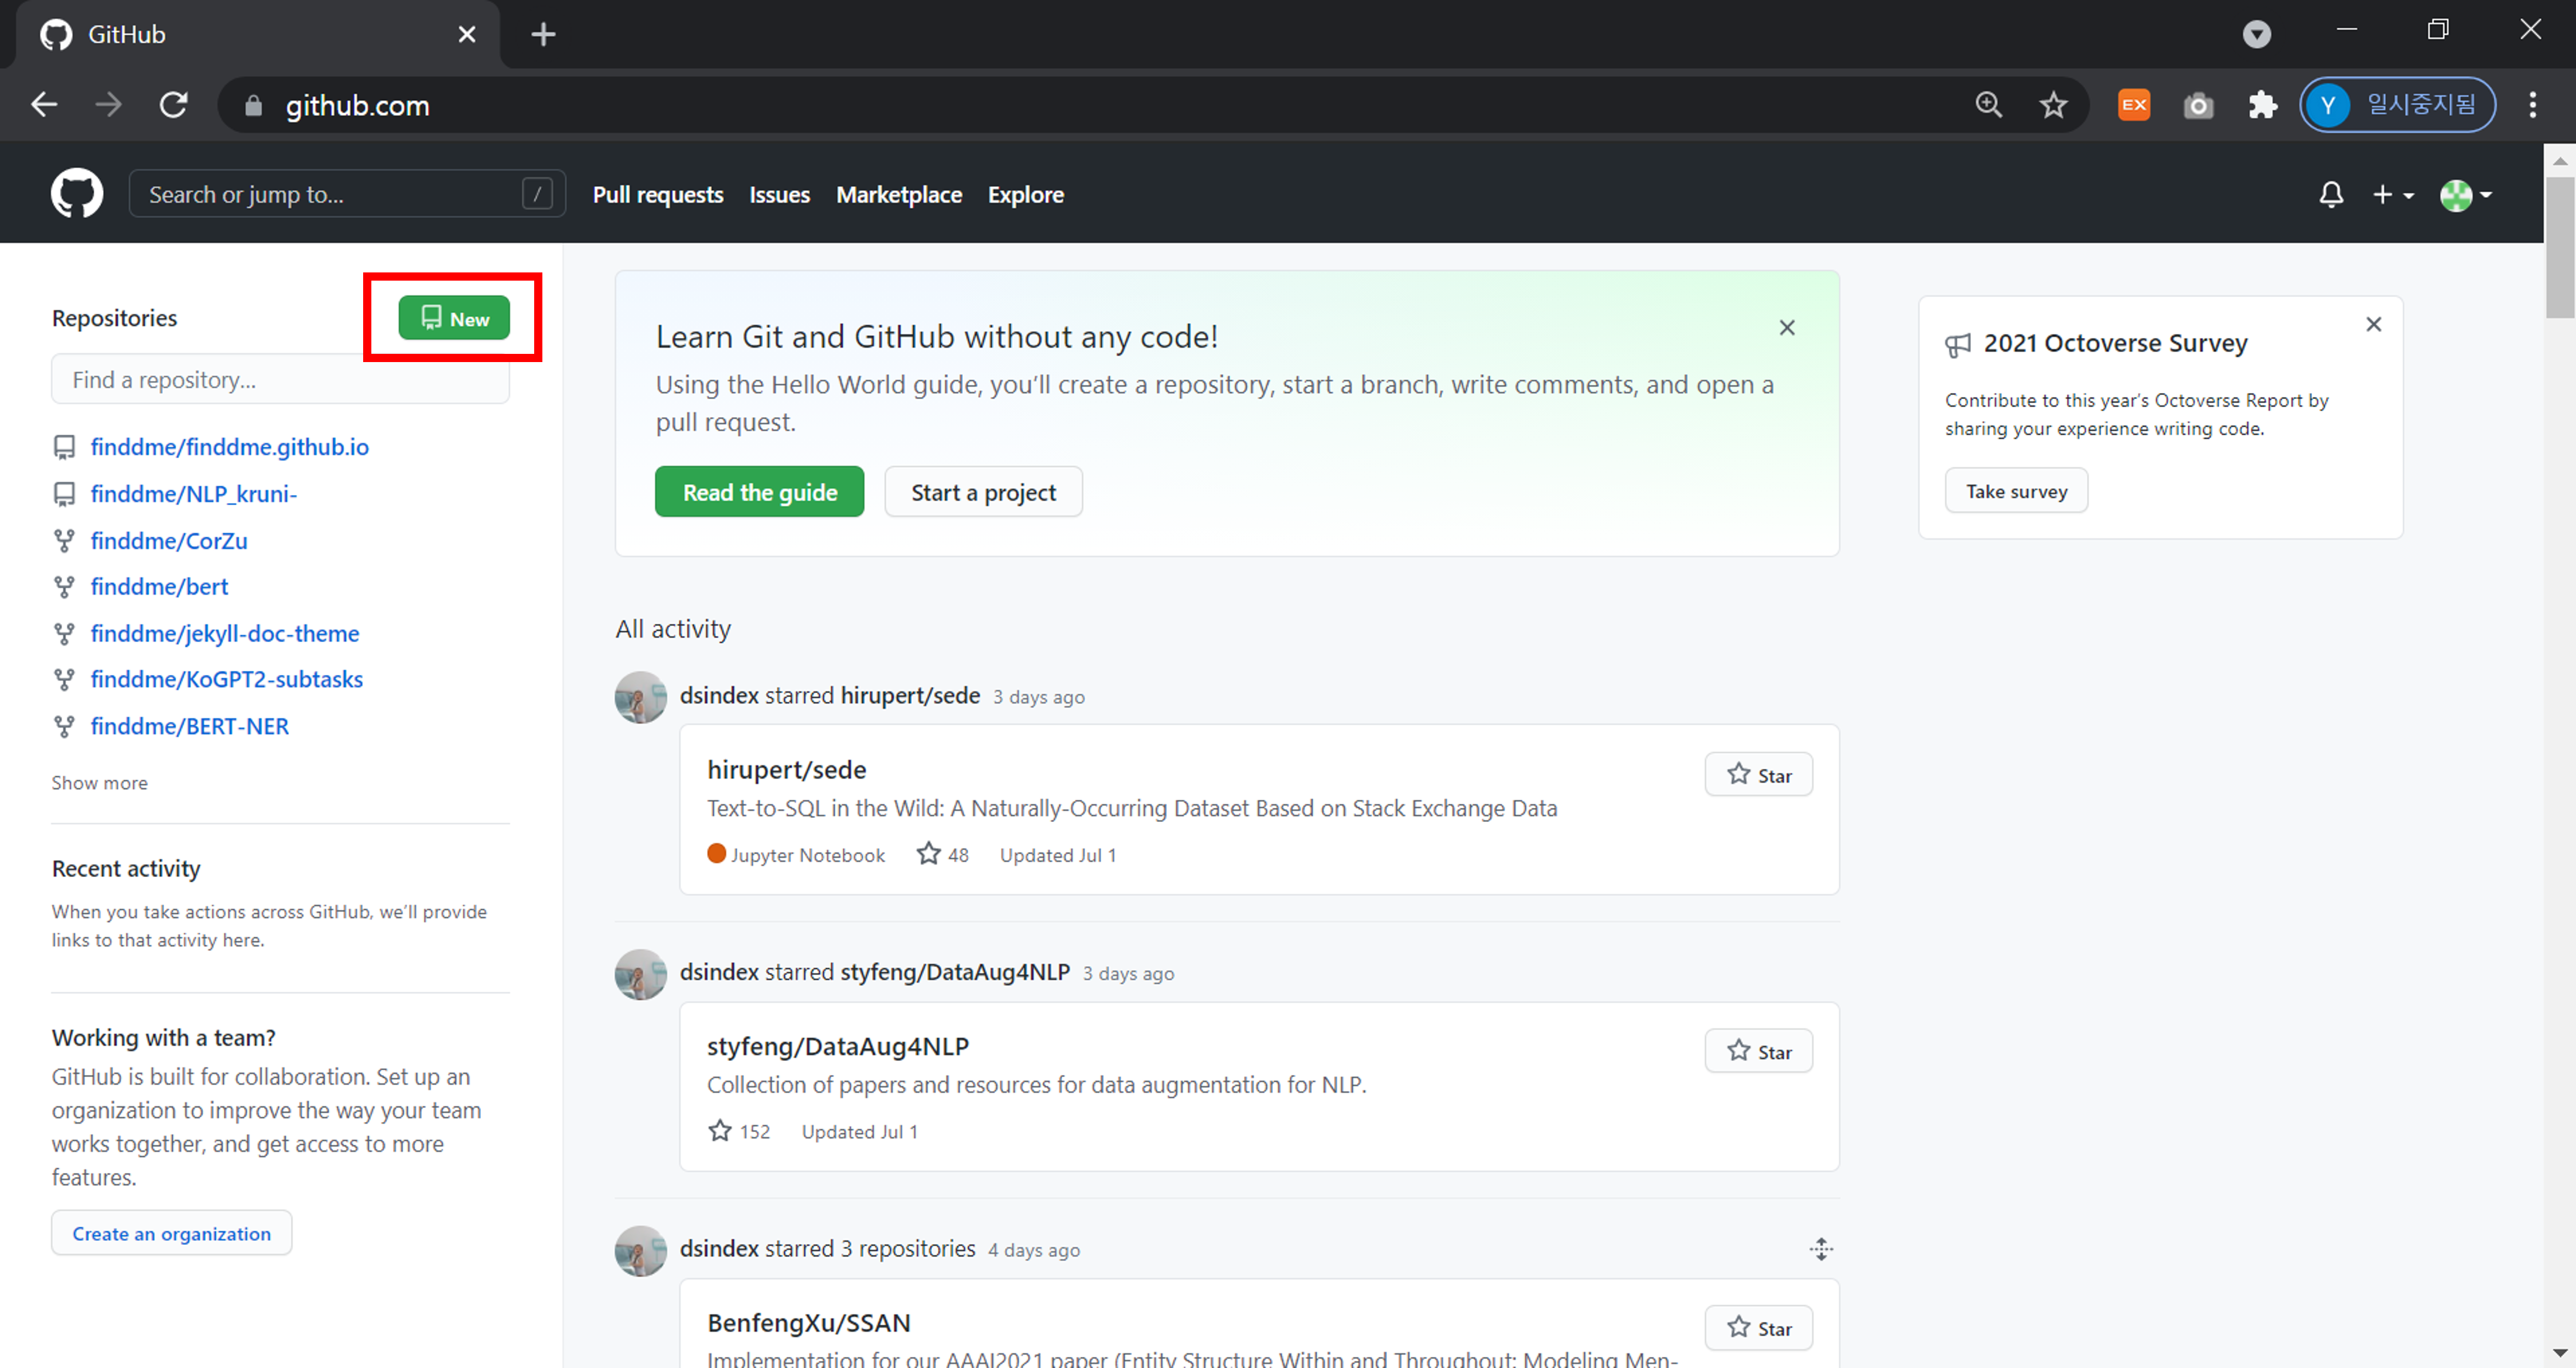
1. 새 Repository 만들기
2. Repository이름 입력하고 생성
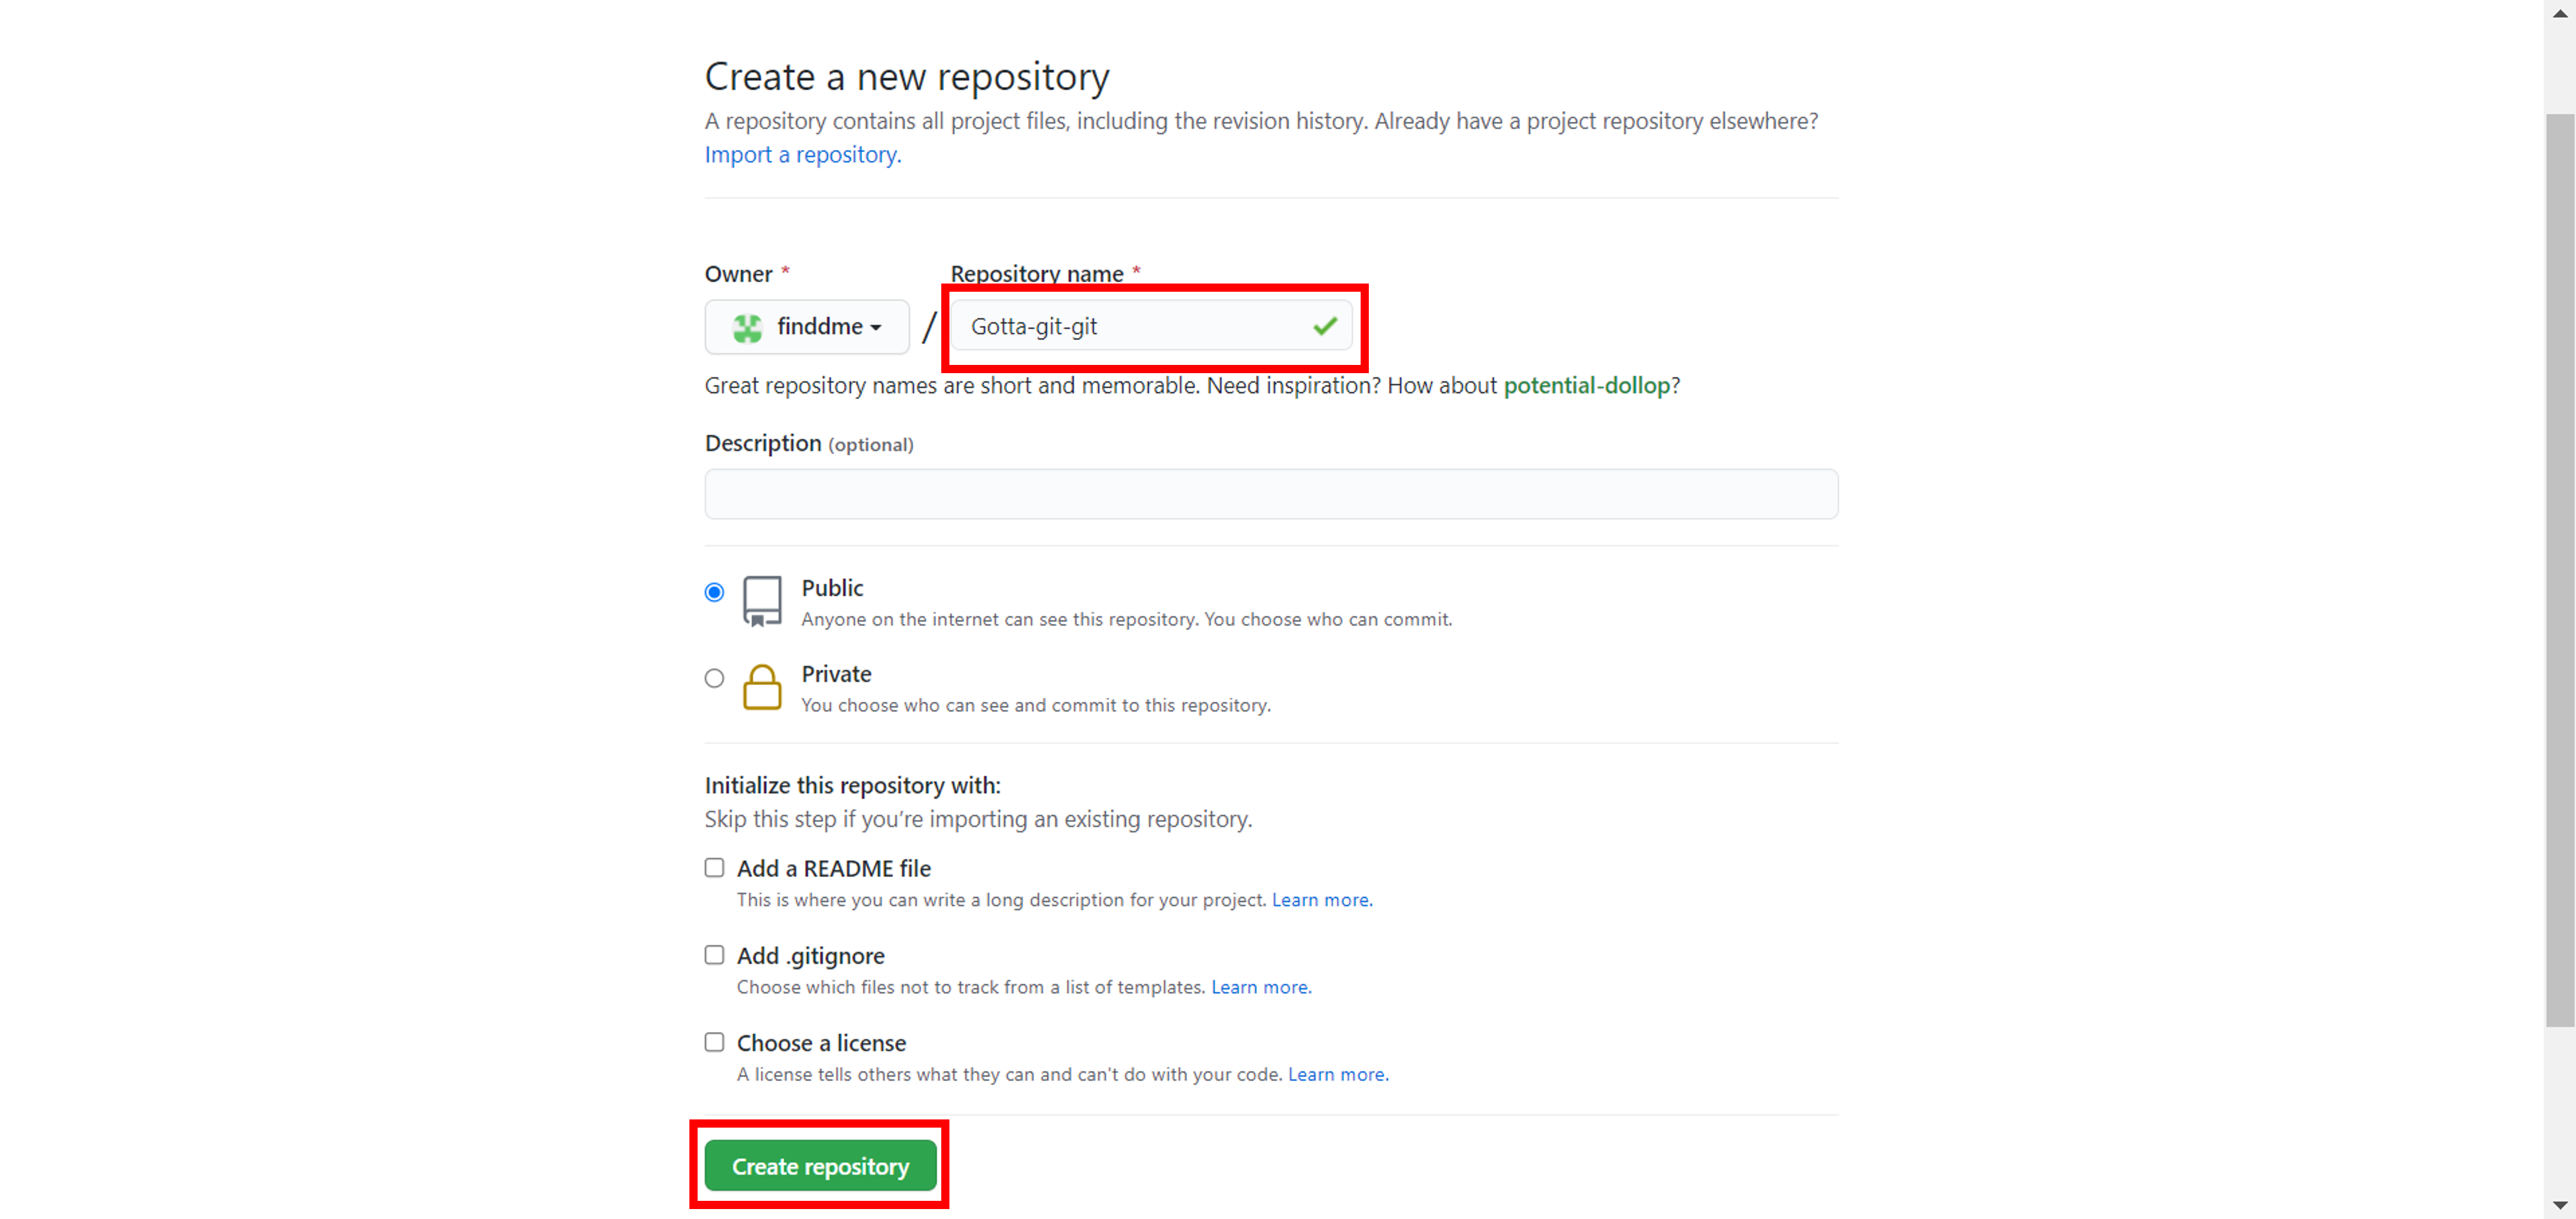
(gitignore는 프로젝트에 사용된 데이터베이스 등을 gitignore로 설정하여 다른 사람들이 볼 수 있는 공간에 올라가지 않도록 하는 것이다.)
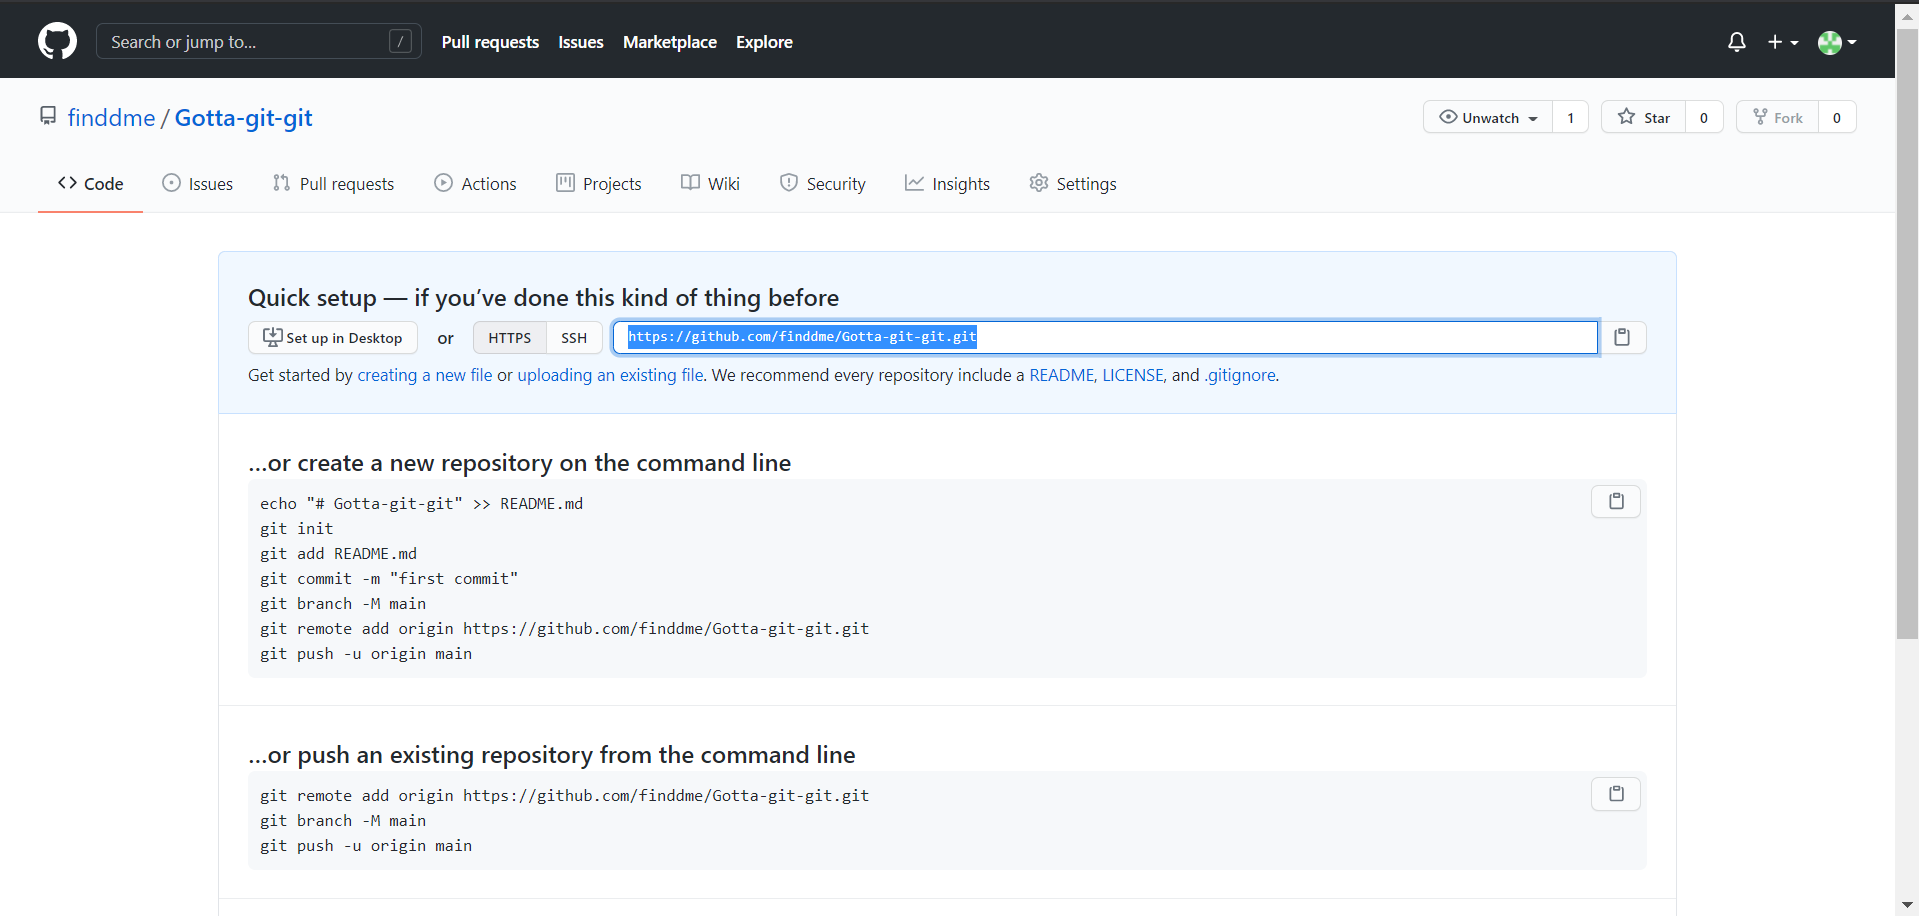
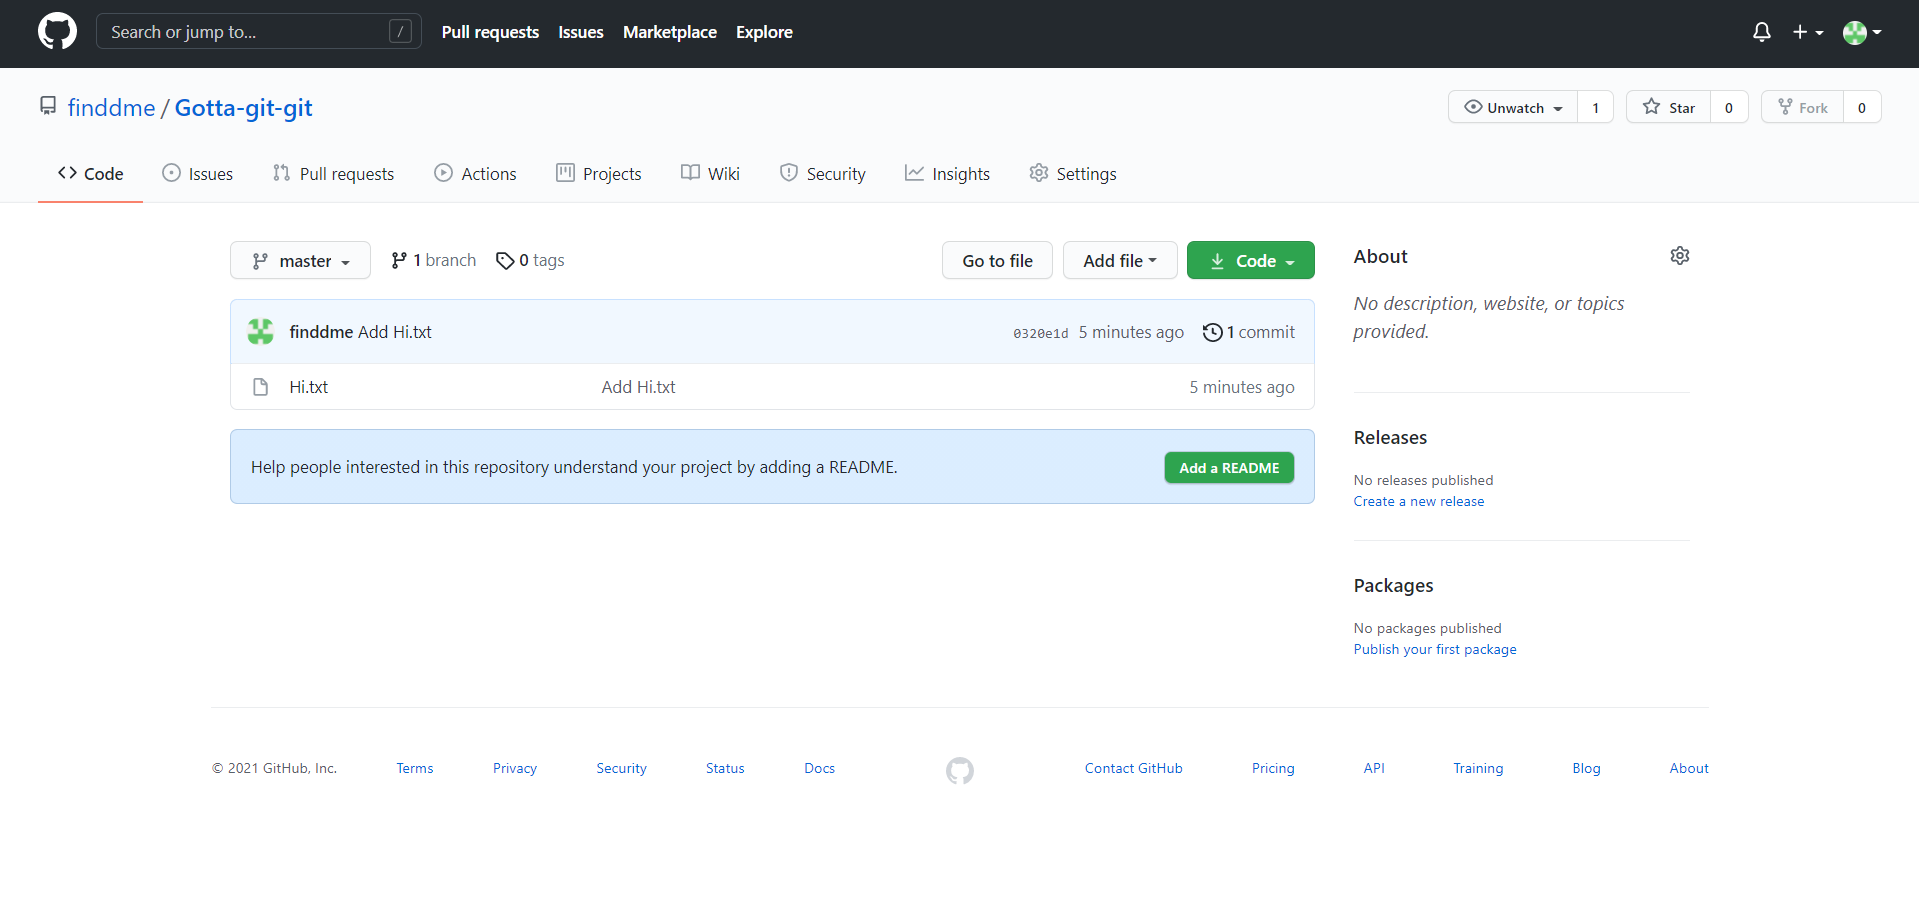
Repository를 만들었다.
3. Git Software 다운로드
만들어진 Repository에 내용을 올리려면 git software를 사용해야 한다. git-scm.com/downloads에서 다운 받을 수 있다.
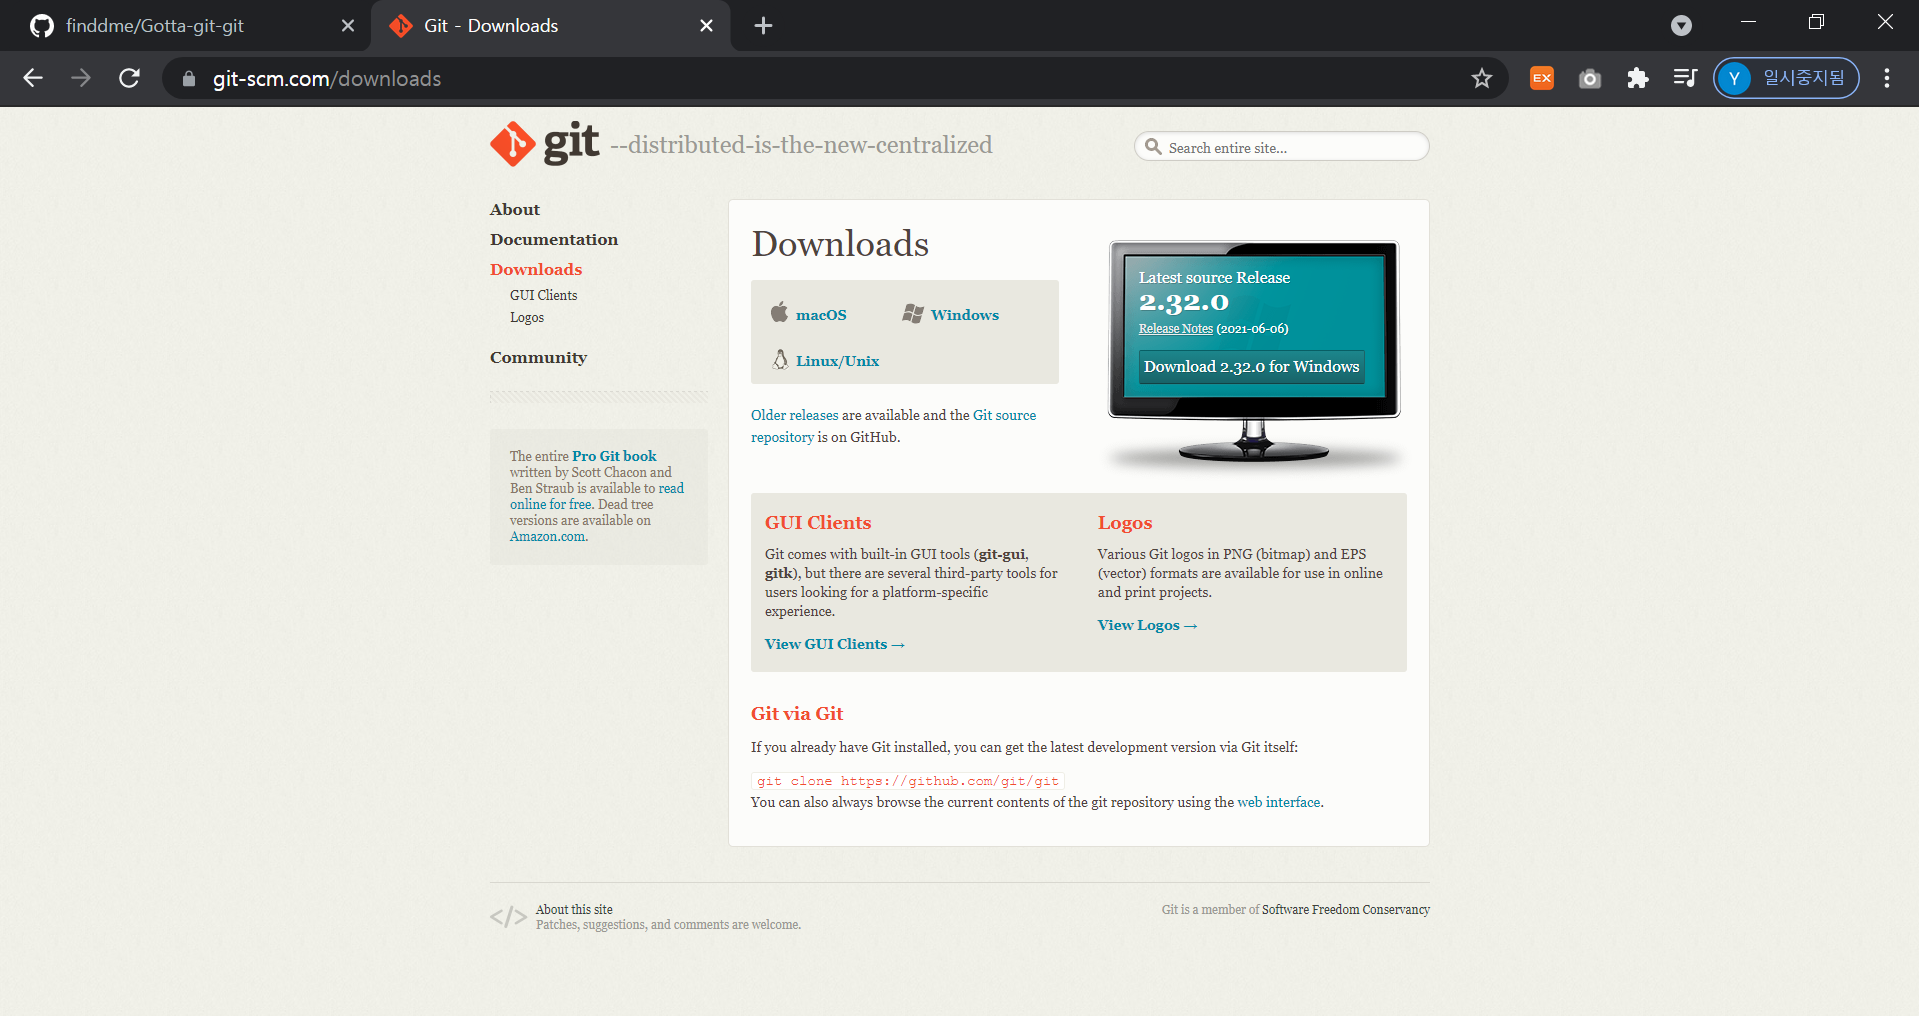
설치창이 뜨면 기본 설정을 그대로 두고 next 버튼만 계속 눌러서 설치를 한다. git을 설치하면 명령 프롬프트에서 git명령을 사용할 수 있다.
4. 명령 프롬프트에서 git-hub 계정 접근
명령 프롬프트를 열고 git을 입력하면 아래와 같이 뜬다.
git
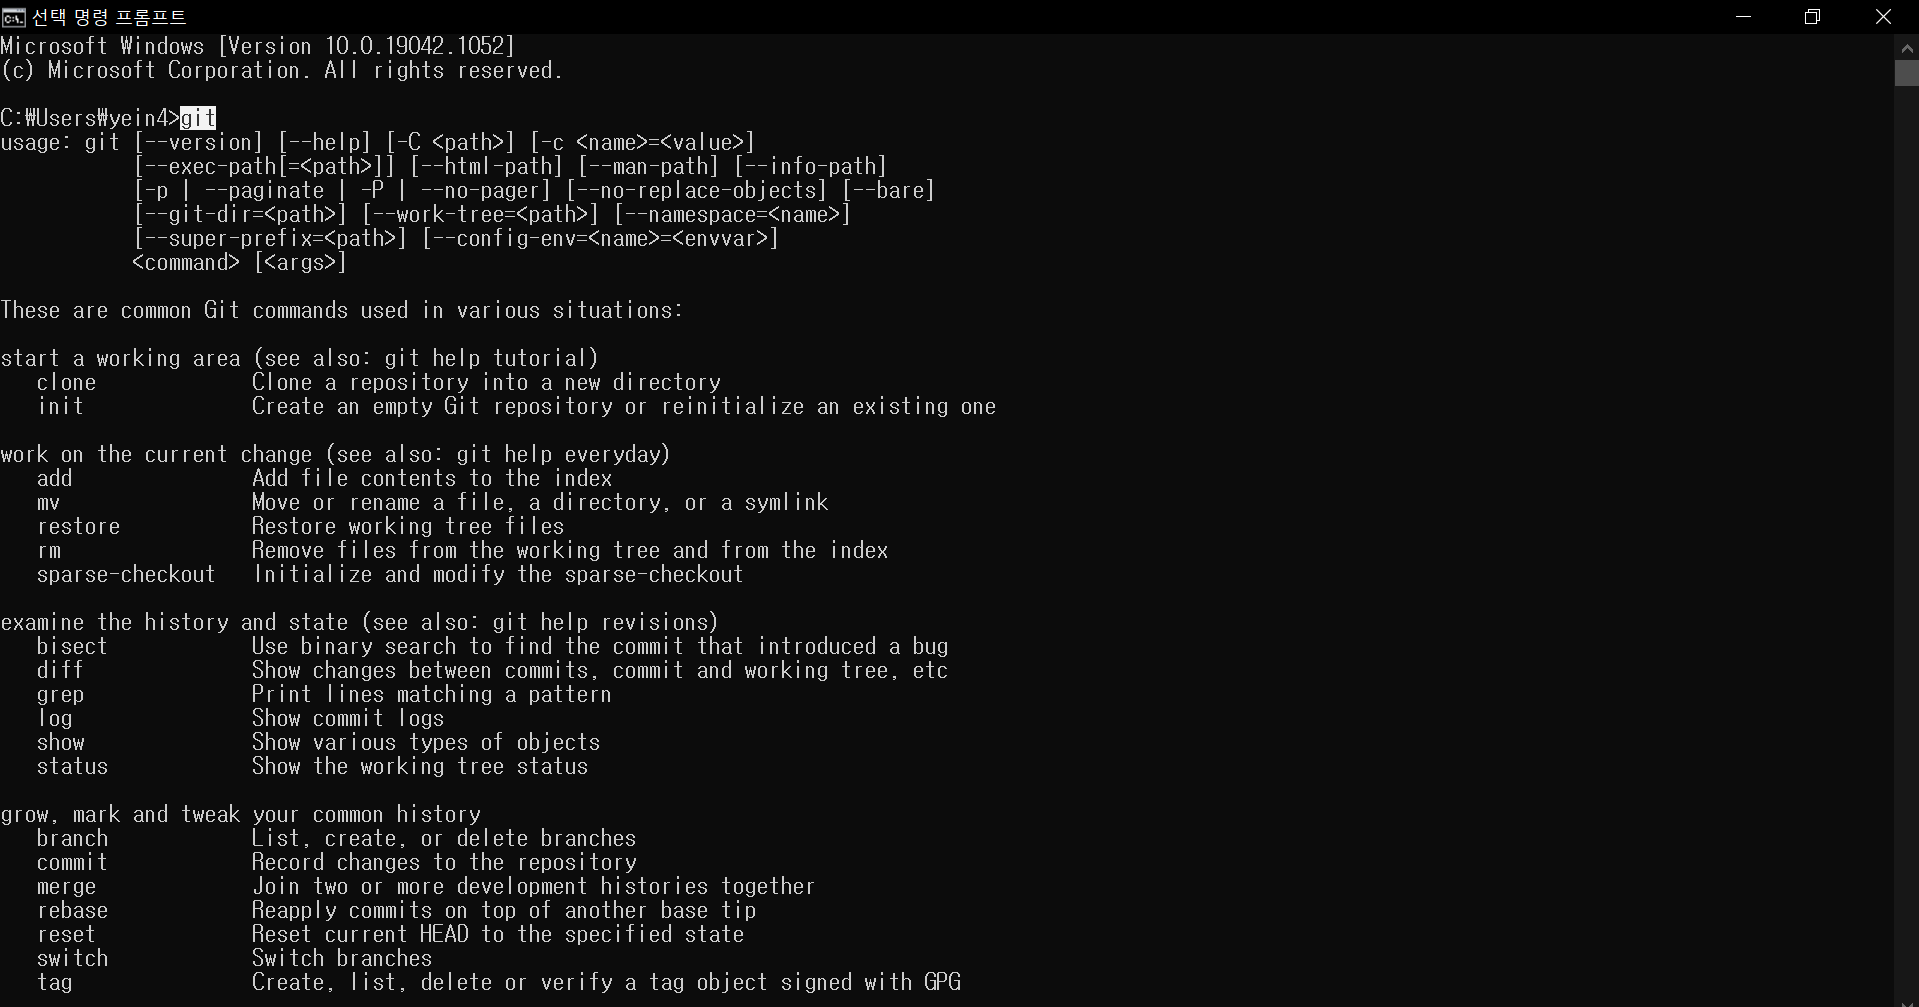
이제 컴퓨터에서 git을 사용하기 위한 환경설정을 한다.
git config --global user.name (github 계정)

git config --global user.email (email)
을 입력하면 환경설정이 완료된 것이다. 이제 컴퓨터에서 git을 사용할 수 있다.
5. github와 컴퓨터 연동시키기
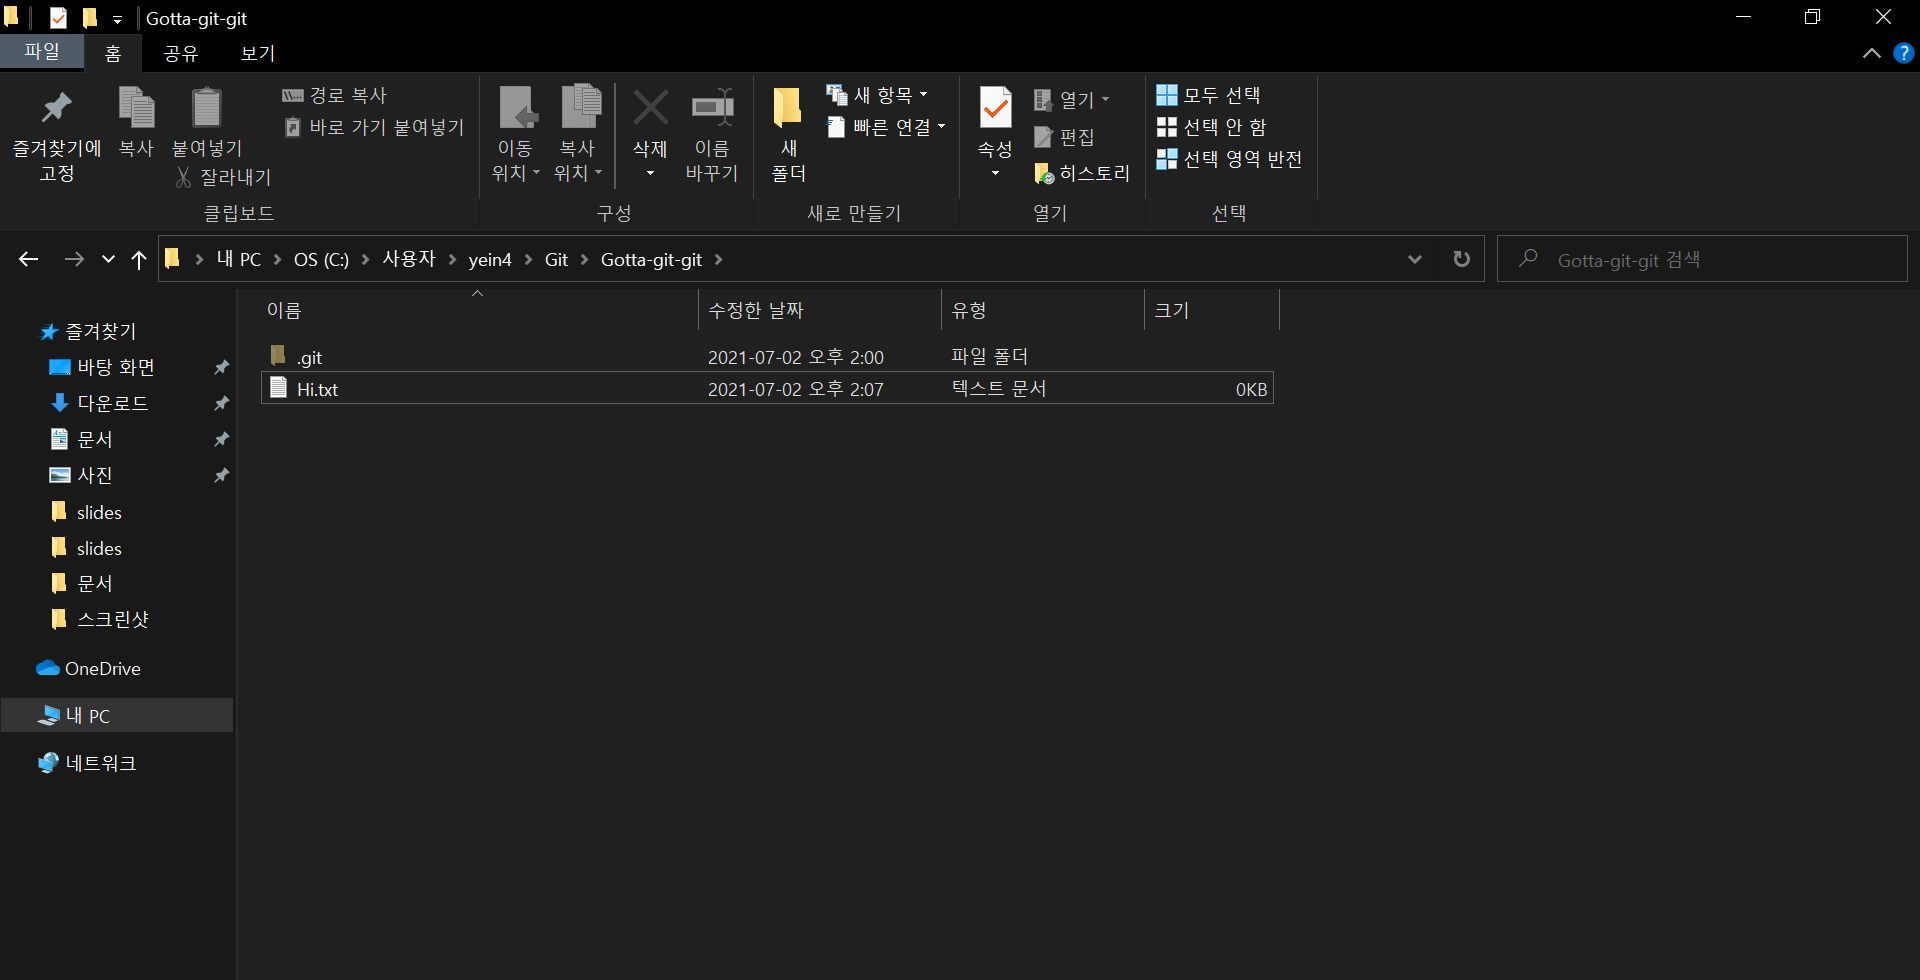
(1) 이제 C드라이브에 github와 컴퓨터를 동기화시킬 저장소를 만든다. 그냥 빈 파일을 만들어 놓으면 된다.
(2) 파일을 만들어 놓고 다시 github에 들어와서 Repository의 주소를 복사한다.
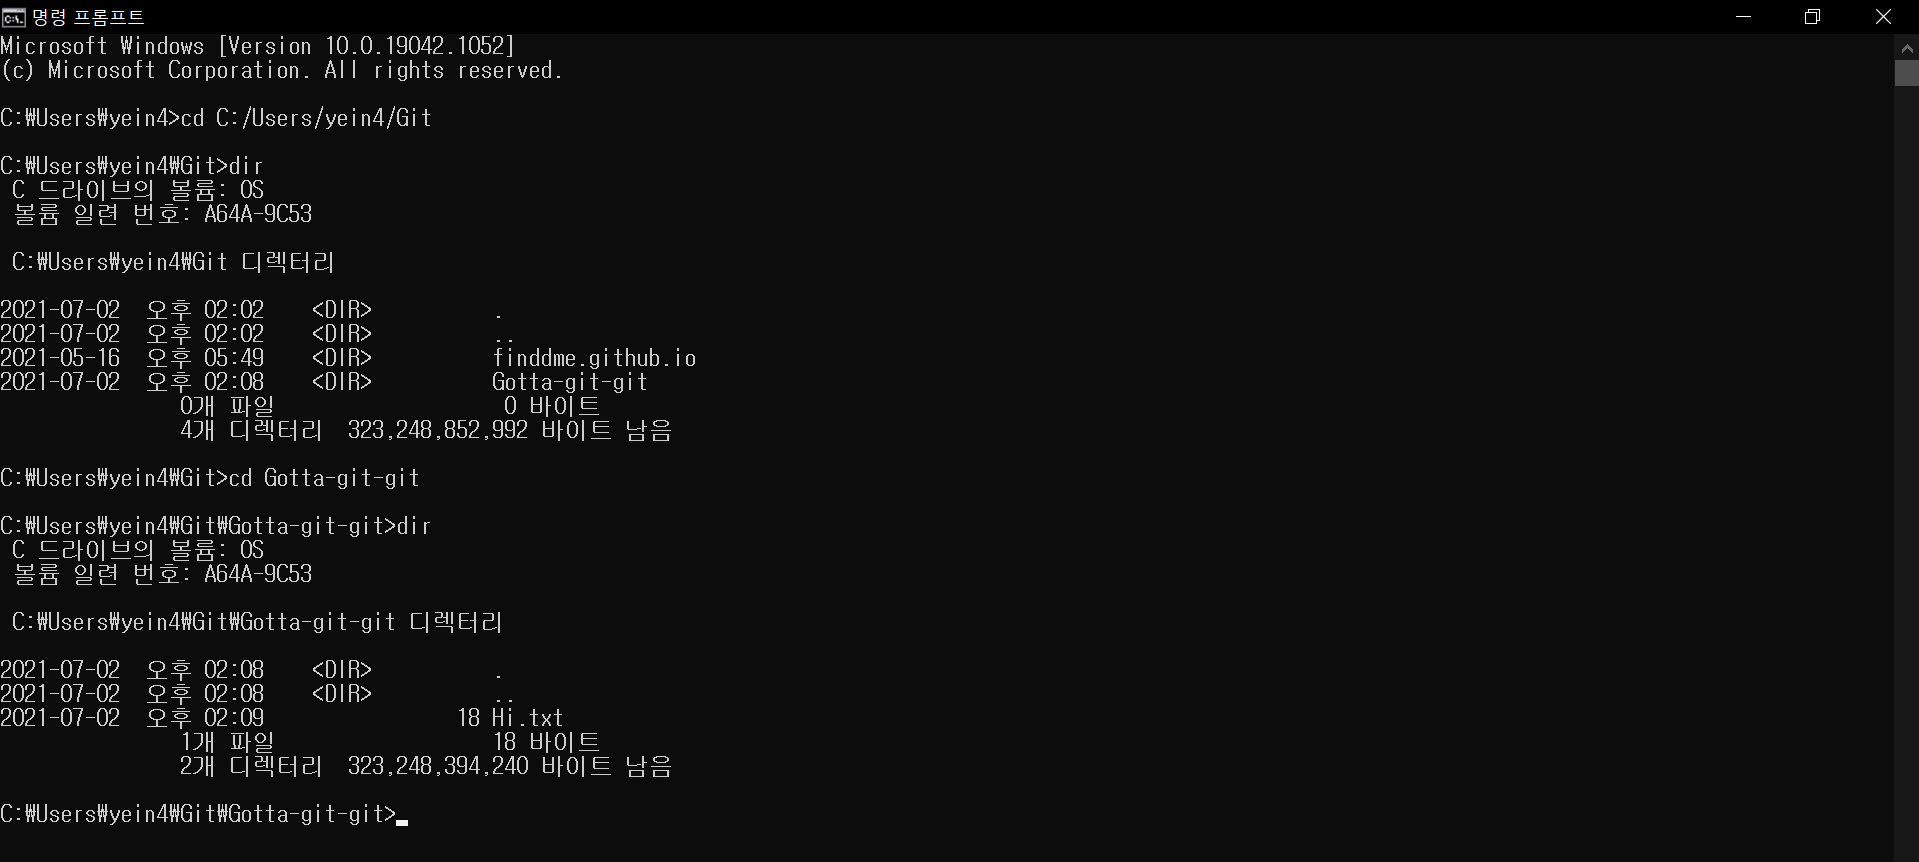
(3) cmd에서 아까 만든 파일 경로로 간다. 예를 들어 아래 처럼 입력해서 가면 된다. (cd는 change directory의 약자)
cd C:/Users/yein4/Git

dir를 입력하면 해당 파일 정보를 볼 수 있다.
dir
(4) 이제 github Repository를 clone한다.
git clone (복사한 Repository 주소)

이러면 저장소에 있는 모든 것들이 컴퓨터로 clone된다. 소스코드를 다운받는 것이라 생각하면 편하다. 그래서 다른 오픈소스들도 clone하여 내 컴퓨터에서 이용할 수 있다.
(간혹 비밀번호를 입력하라고 뜰 때가 있는데 git config –global user.password (비밀번호)를 입력하면 된다.)
이제 컴퓨터의 Repository는 Local Repository라고 하고 github에 있는 Repository는 Remote Repository(원격 Repository)라고 한다.
Git Command
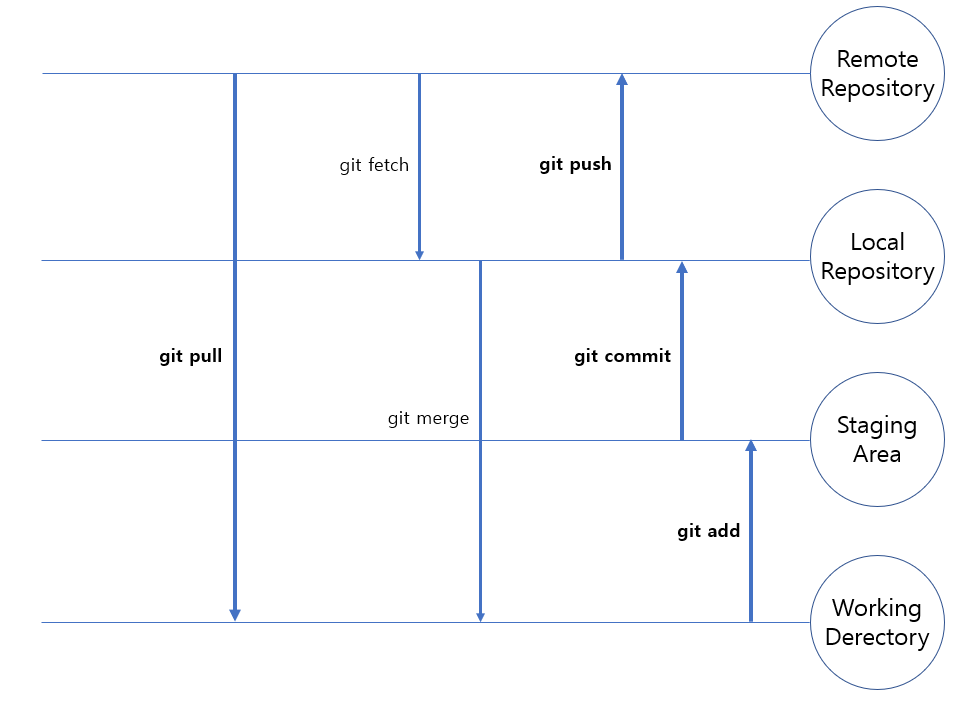
- Working Derectory: 컴퓨터에서 이루어지는 작업
- Staging Area: commit할 작업물을 올려놓는 곳
- Local Repository: 컴퓨터 내 저장소(git commit을 하면 Repository를 연동한 폴더 내에 있는 .git(git프로젝트에 대한 데이터가 저장되는 derectory)에 기록된다)
- Remote Repository: Github(git push를 해야 컴퓨터에서 변경한 내용이 github에 반영된다)
1. git add
파일을 아무거나 만들어 본다.
git add (add할 파일명)

# 특정 파일이 아니라 전부를 add하고 싶을 때. git add를 사용하면 수정된 모든 내역들이 알아서 반영된다.

git add .

2. git commit
add되어서 Staging Area에 있는 것만 commit할 수 있다.
git commit -m "(commit 내용)"

3. git push
git push

git push까지 하고 나면 github에 파일이 반영된 것을 확인할 수 있다.
4. git pull
git fetch + git merge = git pull
5. git status
Repository의 상태를 확인할 수 있는 명령어다.
git status

위 사진에서는 First.py파일을 add하라고 떠있다. 이렇게 변경사항이 있는데 add되지 않은 것이 있으면 알려준다.

Add하고 나면 New File이 있다고 뜬다.

commit하고 나면 commit 하나 했다고, commit할 거 없다고 뜬다.

수정된 파일이 있으면 restore하거나 add하라고 뜬다.
6. git log
이 명령어를 쓰면 commit 내역들을 볼 수 있다.
git log
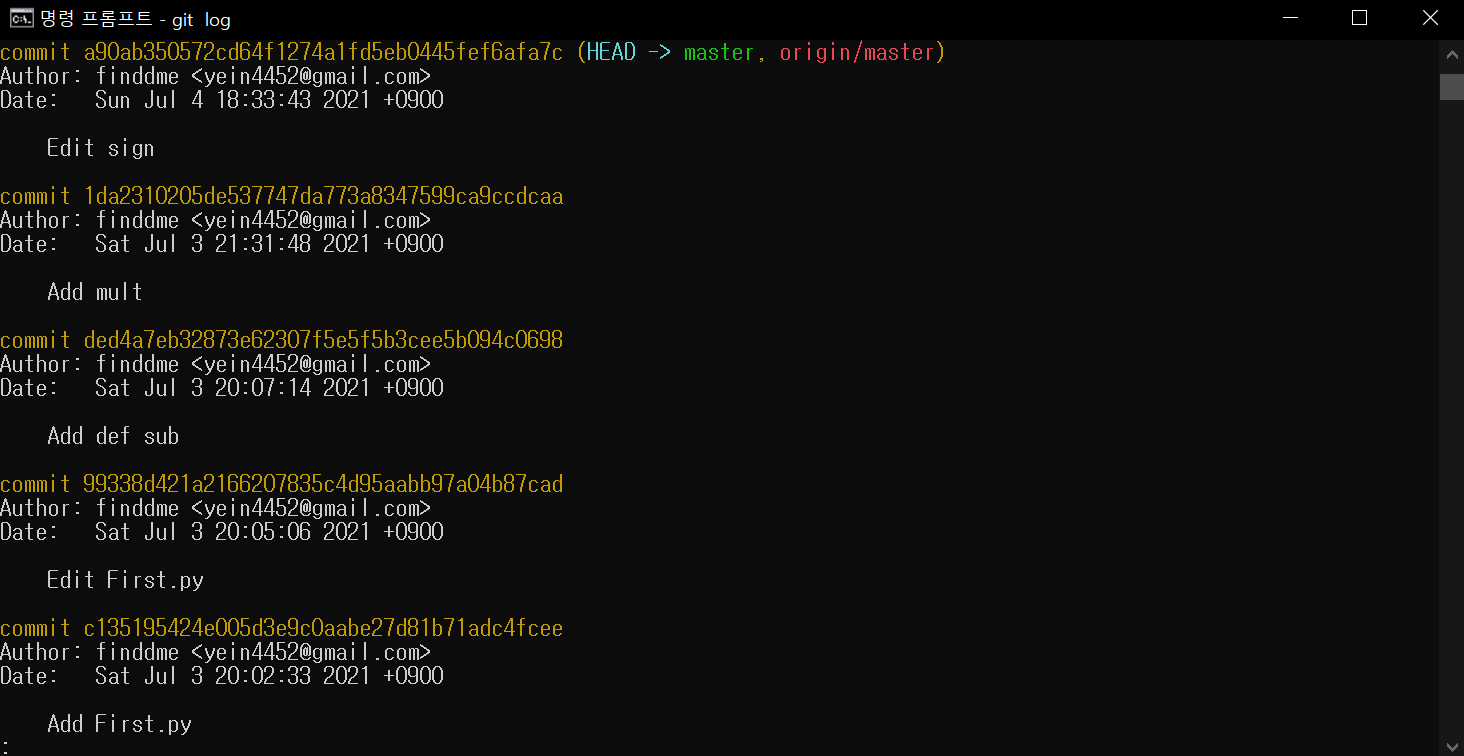
위 그림처럼 log내역이 너무 길면 :_가 있는데 enter를 누르면 내역을 더 볼 수 있고, Q를 누르면 log내역에서 나가진다.
7. git reset
add한 것을 취소하고 싶을 때 reset명령을 쓴다.
git reset (파일명)

8. git reset –hard
파일을 commit한 상태에서는 commit 해쉬값(log내역에서 확인 가능)을 이용해 해당 commit 상태로 돌아갈 수 있다. 하드하게 특정 commit지점 이후의 commit들을 다 지워버리겠다는 옵션이다. soft(특정 지점으로 돌아가되 그 지점 이후의 commit들을 지우지 않고 보관하는 옵션)과 mixed옵션도 있다.
git reset --hard (해쉬값 복붙)

근데 이걸 쓰고나면 Local이랑 Remote상태가 다르기 때문에 git push가 안된다. 강제로 push하는 명령을 써야 한다.
git push -f
9. git commit –amend
이 명령어로 commit 내용을 변경할 수 있다.
git commit --amend
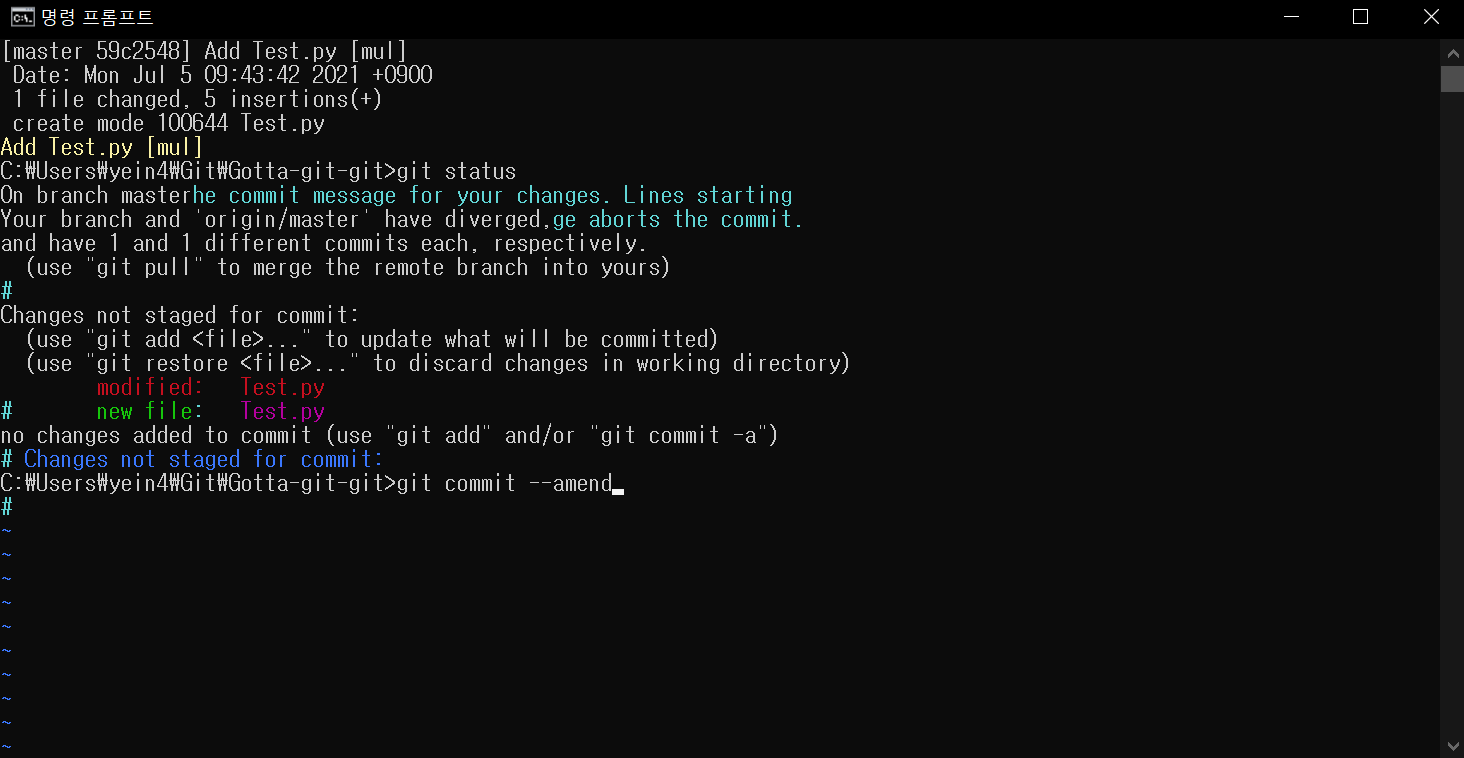
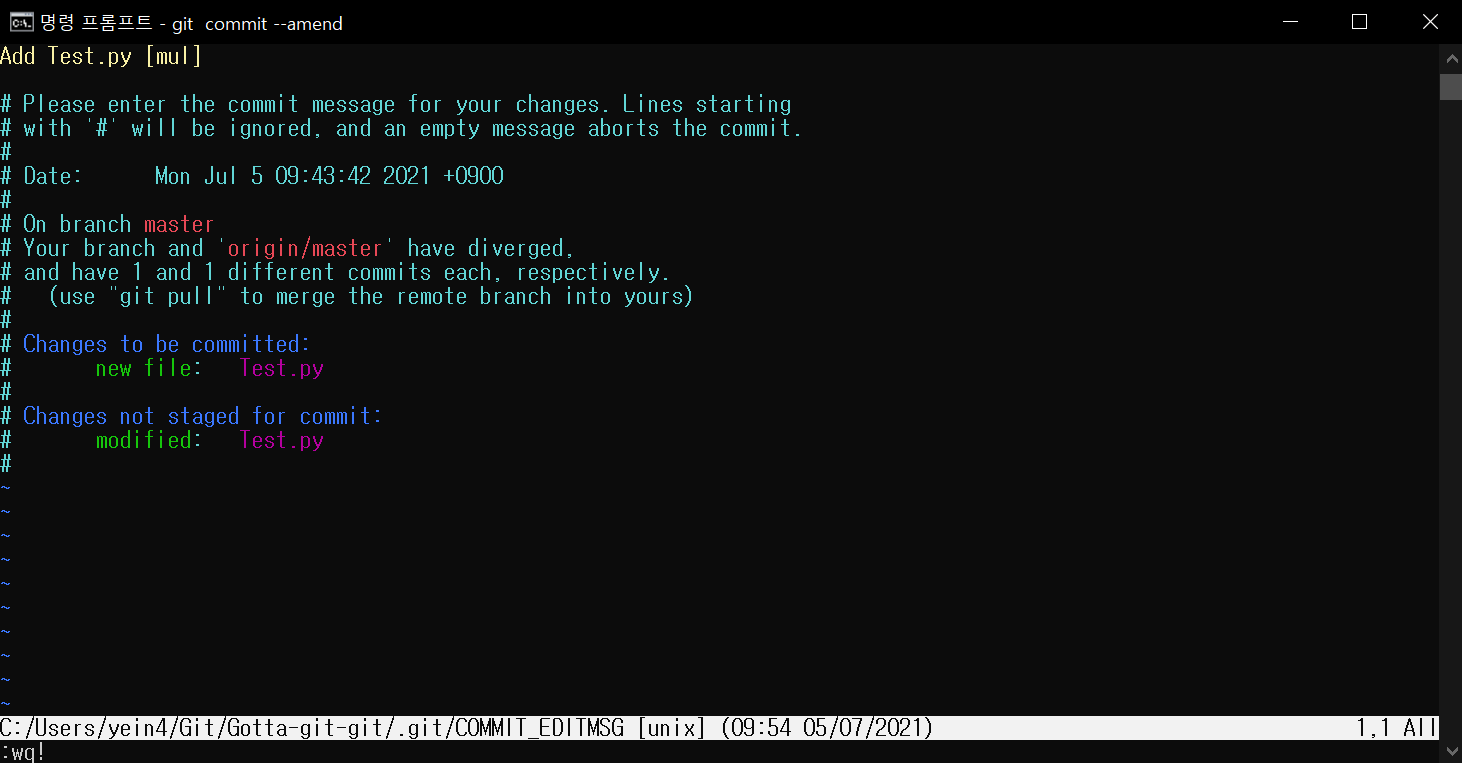
아래와 같은 창이 뜨면,

Edit Anyway를 선택한다. 그러면 Unix Editor가 뜬다.

A를 누르면 수정할 수 있고, esc를 누르고 :wq!를 입력하면 Unix Editor에서 나갈 수 있다.
Archive
Repository에 있는 소스코드만 압축하여 내보내고 싶을 때 archive를 사용하면 된다.(.git은 압축되지 않음. 딱 소스코드만 묶어서 내보내고 싶을 때 사용)
git archive --format=zip master -o G.zip

# --format=zip: 압축파일 형태는 zip
# master: 추출할 branch
# -o: output설정
# G.zip: 파일 이름
Github
Git은 여러명이 하나의 소스코드를 동시에 작업하기 위한 협업 관리 도구이다. 여러명이 동시에 사용할 수 있고, 작업된 모든 commit 내역이 저장되어 오류가 생겼을 때 복구가 수월하여 안전하게 프로젝트를 진행할 수 있다. Github 사용자는 committer와 contributer로 나뉜다. 누구나 두 역할을 모두 수행할 수 있다. Github에는 많은 오픈소스들이 있는데, 각 오픈소스들의 주인이 committer이고, 그 오픈소스에 대해 contribution(오류 수정/ 기능 추가/ 보안 취약점 수정 등)하는 사용자가 contributer이다. contributer가 committer에게 오픈소스 수정 내용에 대한 PR(Pull Request)를 보내면 committer가 반영 여부를 결정한다.
Git Repository
Git으로 프로젝트를 진행하려면 일단 github에 가입을 해야하고, 가입 후에는 Repository를 만들어야 한다. Repository를 만드는 방법을 소개해 보도록 하겠다.
1. 새 Repository 만들기
2. Repository이름 입력하고 생성
(gitignore는 프로젝트에 사용된 데이터베이스 등을 gitignore로 설정하여 다른 사람들이 볼 수 있는 공간에 올라가지 않도록 하는 것이다.)
Repository를 만들었다.
3. Git Software 다운로드
만들어진 Repository에 내용을 올리려면 git software를 사용해야 한다. git-scm.com/downloads에서 다운 받을 수 있다.
설치창이 뜨면 기본 설정을 그대로 두고 next 버튼만 계속 눌러서 설치를 한다. git을 설치하면 명령 프롬프트에서 git명령을 사용할 수 있다.
4. 명령 프롬프트에서 git-hub 계정 접근
명령 프롬프트를 열고 git을 입력하면 아래와 같이 뜬다.
git
이제 컴퓨터에서 git을 사용하기 위한 환경설정을 한다.
git config --global user.name (github 계정)
git config --global user.email (email)
을 입력하면 환경설정이 완료된 것이다. 이제 컴퓨터에서 git을 사용할 수 있다.
5. github와 컴퓨터 연동시키기
(1) 이제 C드라이브에 github와 컴퓨터를 동기화시킬 저장소를 만든다. 그냥 빈 파일을 만들어 놓으면 된다.
(2) 파일을 만들어 놓고 다시 github에 들어와서 Repository의 주소를 복사한다.
(3) cmd에서 아까 만든 파일 경로로 간다. 예를 들어 아래 처럼 입력해서 가면 된다. (cd는 change directory의 약자)
cd C:/Users/yein4/Git
dir를 입력하면 해당 파일 정보를 볼 수 있다.
dir
(4) 이제 github Repository를 clone한다.
git clone (복사한 Repository 주소)
이러면 저장소에 있는 모든 것들이 컴퓨터로 clone된다. 소스코드를 다운받는 것이라 생각하면 편하다. 그래서 다른 오픈소스들도 clone하여 내 컴퓨터에서 이용할 수 있다.
(간혹 비밀번호를 입력하라고 뜰 때가 있는데 git config –global user.password (비밀번호)를 입력하면 된다.)
이제 컴퓨터의 Repository는 Local Repository라고 하고 github에 있는 Repository는 Remote Repository(원격 Repository)라고 한다.
Git Command
- Working Derectory: 컴퓨터에서 이루어지는 작업
- Staging Area: commit할 작업물을 올려놓는 곳
- Local Repository: 컴퓨터 내 저장소(git commit을 하면 Repository를 연동한 폴더 내에 있는 .git(git프로젝트에 대한 데이터가 저장되는 derectory)에 기록된다)
- Remote Repository: Github(git push를 해야 컴퓨터에서 변경한 내용이 github에 반영된다)
1. git add
파일을 아무거나 만들어 본다.
git add (add할 파일명)
# 특정 파일이 아니라 전부를 add하고 싶을 때. git add를 사용하면 수정된 모든 내역들이 알아서 반영된다.
git add .
2. git commit
add되어서 Staging Area에 있는 것만 commit할 수 있다.
git commit -m "(commit 내용)"
3. git push
git push
git push까지 하고 나면 github에 파일이 반영된 것을 확인할 수 있다.
4. git pull
git fetch + git merge = git pull
5. git status
Repository의 상태를 확인할 수 있는 명령어다.
git status
위 사진에서는 First.py파일을 add하라고 떠있다. 이렇게 변경사항이 있는데 add되지 않은 것이 있으면 알려준다.
Add하고 나면 New File이 있다고 뜬다.
commit하고 나면 commit 하나 했다고, commit할 거 없다고 뜬다.
수정된 파일이 있으면 restore하거나 add하라고 뜬다.
6. git log
이 명령어를 쓰면 commit 내역들을 볼 수 있다.
git log
위 그림처럼 log내역이 너무 길면 :_가 있는데 enter를 누르면 내역을 더 볼 수 있고, Q를 누르면 log내역에서 나가진다.
7. git reset
add한 것을 취소하고 싶을 때 reset명령을 쓴다.
git reset (파일명)
8. git reset –hard
파일을 commit한 상태에서는 commit 해쉬값(log내역에서 확인 가능)을 이용해 해당 commit 상태로 돌아갈 수 있다. 하드하게 특정 commit지점 이후의 commit들을 다 지워버리겠다는 옵션이다. soft(특정 지점으로 돌아가되 그 지점 이후의 commit들을 지우지 않고 보관하는 옵션)과 mixed옵션도 있다.
git reset --hard (해쉬값 복붙)
근데 이걸 쓰고나면 Local이랑 Remote상태가 다르기 때문에 git push가 안된다. 강제로 push하는 명령을 써야 한다.
git push -f
9. git commit –amend
이 명령어로 commit 내용을 변경할 수 있다.
git commit --amend
아래와 같은 창이 뜨면,
Edit Anyway를 선택한다. 그러면 Unix Editor가 뜬다.
A를 누르면 수정할 수 있고, esc를 누르고 :wq!를 입력하면 Unix Editor에서 나갈 수 있다.
Archive
Repository에 있는 소스코드만 압축하여 내보내고 싶을 때 archive를 사용하면 된다.(.git은 압축되지 않음. 딱 소스코드만 묶어서 내보내고 싶을 때 사용)
git archive --format=zip master -o G.zip
# --format=zip: 압축파일 형태는 zip
# master: 추출할 branch
# -o: output설정
# G.zip: 파일 이름